Anatomy of a Package
#
A minimal npm package should contain metadata in a package.json file and an associated source file (usually index.js). In practice, packages contain more than that and you will have at least a license file and the source in various formats.
Often projects contain more files than are required to execute them. To keep package downloads fast, you can exclude files related to documentation and testing as those can be reached through the package site.
Understanding package.json
#
All packages come with a package.json file that contains package metadata, like information about the author, link to a bug tracker and package dependencies. The official documentation↗ covers them in detail.
The examples below is an annotated part of package.json from the SurviveJS React component boilerplate↗.
Description Fields
#
The description fields describe who created the package, what it does, search keywords, and more.
package.json
{
  /* Name of the project */
  "name": "react-component-boilerplate",

  /* Brief description */
  "description": "Boilerplate for React.js components",

  /* Who is the author + optional email + optional site */
  "author": "Juho Vepsäläinen <email goes here> (site goes here)",

  /* Version of the package */
  "version": "0.0.0",

  /* Do not allow publishing, useful for apps or private packages */
  "private": true,

  /* Keywords related to package. */
  /* Fill this well to make the package discoverable. */
  "keywords": ["react", "reactjs", "boilerplate"],

  /* Files to include to npm distribution. */
  /* Relative patterns like "./src" fail! */
  "files": ["lib/", "esm/", "bin/"]
}
Scripts
#
npm can be used as a task runner through npm run command. Running the command shows all available scripts. The scripts are commonly used for different build tasks.
package.json
/* `npm run <name>` - `npm run` to get the available commands */
{
  "scripts": {
    /* You don’t need to write node_modules/.bin/catalog, npm will */
    /* automatically call locally-installed package. */
    "start": "catalog start docs",

    /* Namespacing (namespace:task) is a convention used for */
    /* grouping. */
    "test": "jest",
    "test:coverage": "jest --coverage",
    "test:watch": "jest --watch",
    "test:lint": "eslint . --ignore-path .gitignore",

    "gh-pages": "catalog build docs",
    "gh-pages:deploy": "gh-pages -d docs/build",

    "build": "npm run build:esm && npm run build:cjs",
    "build:esm": "babel --delete-dir-on-start -d esm/ src/",
    "build:cjs": "babel --delete-dir-on-start --env-name cjs -d lib/ src/",

    "preversion": "npm run test",
    "prepublishOnly": "npm run build",
    "postpublish": "npm run gh-pages && npm run gh-pages:deploy",

    /* If your library is installed through Git, compile it */
    "postinstall": "node lib/post_install.js"
  }
}
Certain scripts, such as start and test, have shortcuts in npm. Examples:
npm tornpm testmaps tonpm run test.npm startmaps tonpm run start.
npm commands, such as npm install, npm publish or npm version, can have hooks↗ attached to them, like in the example above.
Use pre and post prefixes to group your scripts. For example, npm run test will try to run pretest, test, and then posttest scripts. In the example above, the feature is used to control what happens when npm publish is executed.
Though for npm namespaces (like, namespace:task) don’t mean anything, some tools support this convention. For example, npm-run-all↗ allows you to run all tasks inside a namespace — npm-run-all build:*.
postinstall script and how it works is discussed in detail in the Building Packages chapter.
prepublish instead of prepublishOnly. According to the documentation↗, prepublish is run also on npm install. To overcome this confusing behavior, prepublishOnly was implemented.
Entry Points
#
The entry points describe how the package should resolve to your code when used from Node or a bundler, like webpack.
If your code is using JavaScript features not supported by Node, or other language like TypeScript, you should compile the code in two ways:
- To ES5, and use this files as the
mainentry point. It will be used by Node. - To ES5 except ECMAScript modules (ESM), and use it as the
moduleentry point. It will be used by bundlers. This will allow them to do tree shaking.
package.json
{
  /* Entry point for command line interface. */
  /* Don't set this unless you intend to allow command line usage */
  "bin": "bin/index.js",

  /* Main entry point (defaults to index.js) */
  "main": "lib/",

  /* ESM-based entry point for bundlers. */
  "module": "esm/"
}
On small projects, it’s enough to have all code in index.js in the root folder. On larger ones, you likely want to start splitting it up and move into a directory. Having all code in a directory will make compilation easier.
Dependencies
#
An npm package can have different types of dependencies. We discuss them in the Types of Dependencies section.
package.json
{
  /* Dependencies required to use the package. */
  "dependencies": {
    /* ... */
  },

  /* Dependencies needed to develop/compile the package. */
  "devDependencies": {
    /* ... */
  },

  /* Package peer dependencies. The consumer chooses exact versions. */
  "peerDependencies": {
    "lodash": ">= 3.5.0 < 4.0.0",
    "react": ">= 0.14.0 < 17.0.0"
  }
}
Links
#
A package should link to its repository, homepage, and issue tracker. The fields are optional but they are good to have as it will make it easier for the users to find these through npm site.
package.json
{
  /* Links to homepage, repository, and issue tracker */
  "homepage": "https://<organization/user>.github.io/<project>/",
  "repository": {
    "type": "git",
    "url": "https://github.com/<organization/user>/<project>.git"
  },
  "bugs": {
    "url": "https://github.com/<organization/user>/<project>/issues"
  }
}
If you use GitHub, you can simplify like this:
{
  /* GitHub issues URL will be inferred from the repository URL */
  "homepage": "https://<organization/user>.github.io/<project>/",
  "repository": "https://github.com/<organization/user>/<project>.git"
}
License
#
You should always specify↗ a license of your package, otherwise people will not know if they are allowed to use it. If you don’t specify any license, it means nobody can use your package.
{
  "license": "MIT"
}
You can use an SPDX license identifier↗ or a file with a custom license:
{
  "license": "SEE LICENSE IN <filename>"
}
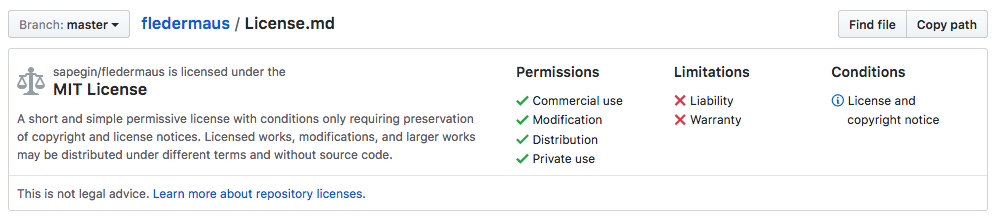
Also GitHub will use this field to show detailed license information in the repository:
Other Fields
#
As you can see, package.json can contain a lot of information. You can attach non-npm specific metadata there that can be used by tooling. Given this can bloat package.json, it’s preferable to keep metadata in files of their own.
What Files to Publish
#
Even though a project can contain a lot of files, not all should be published. Besides wasting bandwidth, this can leak sensitive files to a public registry.
What Should Be in a Package
#
Most of the available npm packages are small and include only a couple of files:
- Entry point, like index.js.
- package.json - package metadata.
- README - it’s shown on the package page at npmjs.com and is a good place for “selling” the project for a potential user. See the README chapter for details.
- CHANGELOG, CHANGES or HISTORY - describe changes for each package version. See Change Logs chapter for details.
- LICENSE or LICENCE - license of your package. You should point to the license by name from package.json.
These files will be included in your package regardless of the package.json files field or .npmignore file. README, CHANGELOG and LICENSE can have any case and extension.
What Could Be in a Package
#
There’s no official recommendations on what files to publish, except a list↗ of files that should be ignored by default or included regardless of your settings (the ones listed above).
The most controversial question is whether you should publish tests and documentation as part of an npm package. There’s a good Stack Overflow discussion↗.
Same with the source code if you compile it before publishing. These files aren’t required to use the package but some people may want them to compile your code themselves or if they like to dig into packages on a plane.
What Should Not Be in a Package
#
In larger projects, you often find the following files that should be excluded from an npm distribution:
- Tooling configuration, like babel.config.json, .eslintrc.json, .travis.yml or webpack.config.js — files like babel.config.json may easily break your user’s build if they try to compile node_modules folder and don’t have one of the plugins listed in your config.
- Tooling or build artifacts like log files — usually anything you have in .gitignore which npm will use by default unless you have .npmignore file. In the latter case you’ll need to copy these patterns from .gitignore.
- File that are required only for development: build scripts or CONTRIBUTING.md.
- Any big files, like images.
- Any sensitive data, like npm publishing keys.
files field correctly. Once you know which ones haven’t set it, consider making pull requests to those projects.
Including and Ignoring Files
#
You can whitelist files that npm will publish, or blacklist files which it won’t publish.
files
Field in package.json
#
files
Field in package.json
Only files or folders listed in the files↗ field will be published.
Pros:
- You’ll never publish a big file or folder accidentally.
Cons:
- You may forget to add a new file here and publish a broken package.
- Doesn’t support negative patterns.
!src/*.test.js, in the files field, Use .npmignore file with a pattern like src/*.test.js instead.
.npmignore File
#
Lists glob patterns of files and folders that shouldn’t be published, like .gitignore (and .gitignore will be used by npm if there’s no .npmignore).
Pros:
- Easier to maintain, because new files will be published by default.
- You can have different rules for different subdirectories.
- Supports negative patterns.
Cons:
- You can accidentally make your package bigger than it could.
Conclusion
#
An npm package contains at least metadata and source. Many of the files that are relevant for development can be skipped in a distribution build to keep downloads fast. Although that’s a small issue, it’s still good to consider as it doesn’t take much effort to filter the files.
You’ll learn how to publish npm packages in the next chapter.