Automation#
Everything that can be done by a machine, will eventually be done by a machine. One of the earliest “computers”, the Jacquard machine↗, achieved this for manufacturing complex textiles. It displaced human effort this way and pushed the difficult and monotonous task to a machine. This is the whole point of automation.
The same idea applies to software projects. Why to repeatedly do something that you can have the machine do for you? Or why to do something the hard way when it’s possible to do it in an easier way while having the machine to assist you?
Git Commit Messages#
Depending on the developer and the development style, the quality of Git commit messages can vary. It’s important data given it may be used in the future as you have to figure out why some code was written the way it was. The quality of commit messages becomes important when more people get involved with the project.
Commit Message Conventions#
Especially AngularJS commit message convention↗ has gained popularity in the JavaScript community. The ideas have been formalized in the Conventional Commits specification↗.
The idea is to provide context to a commit. This enables effective filtering of Git log and it keeps the log tidy. Given the convention is standard, it has lead to tooling that can for example generate change logs for releases or even handle whole release process for you.
To make it easier to follow the aforementioned conventions, commitizen↗ gives a specific command, git cz. It asks you a series of questions and then fills the message with the correct information. This way you don’t have to remember the specification in detail and you will gradually learn it.
AngularJS Commit Message Convention#
In AngularJS convention each commit message consists of:
- Type:
featfor a new feature,fixfor a bug fix,docsfor documentation,chorefor maintenance, etc. - Subject: short change description.
- Body (optional): long change description.
- Footer (optional): breaking changes, GitHub issues references, etc.
For example:
feat($compile): simplify isolate scope bindings

Changed the isolate scope binding options to:
  - @attr - attribute binding (including interpolation)
  - =model - by-directional model binding
  - &expr - expression execution binding

This change simplifies the terminology as well as
number of choices available to the developer. It
also supports local name aliasing from the parent.

BREAKING CHANGE: isolate scope bindings definition has changed and
the inject option for the directive controller injection was removed.

To migrate the code follow the example below:

Before:

scope: {
  myAttr: 'attribute',
  myBind: 'bind',
  myExpression: 'expression',
  myEval: 'evaluate',
  myAccessor: 'accessor'
}

After:

scope: {
  myAttr: '@',
  myBind: '@',
  myExpression: '&',
  // myEval - usually not useful, but in cases where the expression is assignable, you can use '='
  myAccessor: '=' // in directive's template change myAccessor() to myAccessor
}
Messages can be descriptive like this when they capture a big change. During development smaller messages representing meaningful changes are enough. Messages as the one above can be written as the work gets merged to the release branch of the project.
The advantage of doing this is that it makes it easier for other developers to tell what’s going on. Some of the information can be reused for documentation purposes in project main documentation and change logs.
git diff more understandable to other developers. Chris Beams explains the message idea in detail in his blog↗.
Semantic Release#
By default semantic-release makes everything automatically:
- Runs on a CI server after each commit to the
masterbranch. - After each successful build it analyzes new commits and see if there’s something to publish.
- Determines a release type (PATCH, MINOR or MAJOR) by analyzing commit messages written using AngularJS conventions.
- Generates a change log from important commits (skips documentation and maintenance commits).
- Publishes a new package version to npm.
- Publishes change log to GitHub Releases page.
To use semantic-release you need to install its command line tool:
npm install -g semantic-release-cli
Then run it in your project folder:
semantic-release-cli setup
Enter your npm and GitHub credentials, choose type of your CI server.
And now if you make a new commit with a message like fix: allow doodad to work with zero, semantic-release will publish a new PATCH version to npm and publish release notes to GitHub.
Git Hooks#
Git provides a set of hooks that trigger for example before pushing or committing a change. These hooks are ideal for quick checks and they allow you to adjust your source before finally pushing by using git rebase --interactive (or git rebase -i). Rebase workflow is good to know as it allows you to fix mistakes before they get shared with other developers.
Git hooks can be used in a JavaScript project with a package such as husky↗. It connects Git hook interface with npm scripts. Consider the example below:
package.json
"husky": {
  "hooks": {
    "pre-push": "npm test"
  }
}
The package will do all the wiring required and run project tests before pushing to the repository.
Automating Linting With lint-staged#
lint-staged↗ runs linters only for changed files before each commit which makes linting mandatory and fast. It uses pre-commit Git hook and you can map any file extension to a shell command. You can also configure it to autofix code.
pre-commit hook with git commit --no-verify in the GitHub UI.
Setting up lint-staged#
Let’s install lint-staged and husky↗ to manage Git hooks:
npm install lint-staged husky --save-dev
Update your package.json like this:
package.json
{
  "husky": {
    "hooks": {
      "pre-push": "lint-staged"
    }
  },
  "lint-staged": {
    "*.js": [
      "eslint --fix",
      "jest --bail --findRelatedTests",
      "prettier --write",
      "git add"
    ],
    "*.scss": ["stylelint --fix", "prettier --write", "git add"]
  }
}
This configuration will perform the following steps:
Every time you commit a .js file:
- Run ESLint with autofixing on files you are committing.
- Run Jest tests related to files you are committing.
- Format files you are committing with Prettier.
- Add changes caused by autofixing and reformatting to your commit.
Every time you commit an .scss file:
- Run stylelint with autofixing on files you are committing.
- Format files you are committing with Prettier.
- Add changes caused by reformatting to your commit.
Automating Releases#
To make it easier to manage SemVer, next-ver↗ can compute the next version you should use and update it for you. commitizen↗ goes further and allows change log generation and automated releases. semantic-release↗ allows you to automatically make new npm releases and publish release notes to GitHub.
All these tools rely on commit message convention.
gh-lint#
https://www.npmjs.com/package/gh-lint↗
Danger#
Danger JS↗ runs as a part of your CI script, can validate common code review requirements and fail the CI if they aren’t met.
For example:
- Require to update the npm lockfile every time package.json changes.
- Require new tests when new code is added.
- Require a change log entry.
- Check for test shortcuts like
it.onlyordescribe.only. - Check for
TODOandFIXMEcomments. - Check that the pull request was sent to a correct branch.
- Check number of changed lines and suggest to split the pull request if it’s too big.
- Check that new files have a proper copyright message.
- Welcome first time contributors to your project.
- Ping specific people on changes in specific files.
Danger has no default rules but it has a JavaScript API that allows you to inspect source code changes, pull request metadata, build log, post comments on the pull request and mark the build as failed.
To use Danger you need a GitHub bot user. Each GitHub user is allowed to create one bot user. You do it the same way you’ve created your own account but you can use this user for automation, like posting comments using a script.
Let’s install Danger:
npm install --save-dev danger
Create a Dangerfile, dangerfile.js in your project root folder, like this:
import { danger, warn, fail } from 'danger';
// Warn (won’t fail the CI, just post a comment) if the PR has
// changes in package.json but no changes in package-lock.json
const packageChanged = danger.git.modified_files.includes(
'package.json'
);
const lockfileChanged = danger.git.modified_files.includes(
'package-lock.json'
);
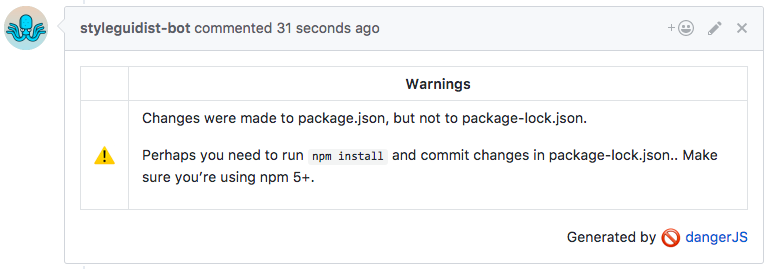
if (packageChanged && !lockfileChanged) {
warn(
'Changes were made to package.json, but not to ' +
'package-lock.json.' +
'Perhaps you need to run `npm install` and commit changes ' +
'in package-lock.json. Make sure you’re using npm 5+.'
);
}
// Fail the CI when test shorcuts are found
const jsTestChanges = danger.git.modified_files.filter(f =>
f.endsWith('.spec.js')
);
jsTestChanges.forEach(file => {
const content = fs.readFileSync(file).toString();
if (
content.includes('it.only') ||
content.includes('describe.only')
) {
fail(`An \`.only\` was left in tests (${file})`);
}
});
Update your .travis.yml to make it run on Travis CI:
language: node_js
node_js:
  - 8
script: npm run test npx danger ci
You also need to add API token to Travis settings, see getting started guide↗ for details.
Now every time someone sends a pull request that changes package.json but not package-lock.json, the bot will warn them:
Danger has some plugins, like:
- fixme↗ — check for
TODOandFIXMEcomments; - no-test-shortcuts↗ — check for test shortcuts;
- spellcheck↗ — spell checks created or modified Markdown files.
Configuration Automation#
Most of the tools described in this book require some configuration. But maintaining this configuration is far from easy, especially if you want up-to-date configs in all your projects.
Mrm↗ tries to solve this problem. It works like codemods↗: it doesn’t use templates that would overwrite everything, you’re describing in code how to modify or create files to achieve the desired state.
Mrm has many tasks↗ out of the box: CodeCov, EditorConfig, ESLint, .gitignore, Jest, lint-staged, Prettier, semantic-release, React Styleguidist, stylelint, Travis CI, TypeScript, package.json, contributing guidelines, license and readme file. You can create your own task or combine multiple tasks using aliases.
Mrm tries to do minimal changes by inferring indentation style or read it from the EditorConfig and keeping comments in JSON files. It has minimal required configuration by inferring values from the project itself or from the environment, like reading your name and email from your Git or npm configs.
Mrm has utilities to work with the most popular config file formats: JSON, YAML, INI and new line separated text files; install and uninstall npm modules; and file operations.
Let’s install Mrm:
npm install -g mrm
And run like this:
mrm gitignore
mrm license --config:licenseFile README
Optionally, create a config file at ~/.mrm/config.json or ~/dotfiles/mrm/config.json instead of passing values via command line:
{
  "github": "sapegin",
  "eslintPreset": "airbnb",
  "aliases": {
    // Aliases to run multiple tasks at once
    "node": ["license", "readme", "editorconfig", "gitignore"]
  }
}
Bots#
Bots help maintainers by automating some parts of issue and pull request management, like:
- closing stale issues,
- adding comments to issues when a certain label added,
- requiring a certain number of reviews for a pull request,
- preventing merging of pull request with “Work in progress” in title.
Bots usually deployed somewhere and get triggered via GitHub webhooks, meaning they can react to events like new issues, pull requests or comments. GitHub Apps↗ is a recommended way for that.
Probot#
Probot↗ is a framework for building GitHub Apps in Node. For example, you can post a comment to every new issue in the repository:
module.exports = app => {
  app.on('issues.opened', async context => {
    // `context` extracts information from the event,
    // which can be passed to GitHub API calls.
    const params = context.issue({ body: 'Hello World!' });
    // {
    //   owner: 'yourname',
    //   repo: 'yourrepo',
    //   number: 123,
    //   body: 'Hello World!'
    // }

    // Post a comment on the issue
    return context.github.issues.createComment(params);
  });
};
Probot already has many bots↗ that you can use in your app, like:
- Work In Progress↗ — prevents merging of pull requests with “WIP” in the title;
- Stale↗ — closes stale issues and pull requests;
- Lock Threads↗ — locks closed issues and pull requests after a period of inactivity;
- CI Reporter↗ — pastes the error output of a failing build into the pull request;
- Sentiment Bot↗ — replies to toxic comments with a comment and a link to the project’s code of conduct;
- Reaction Comments↗ — deletes +1 comments and suggests to use the GitHub reactions instead;
- Minimum Reviews↗ — enforces a minimum number of reviews on pull requests.
Installation of all the bots is similar, so we are going to describe only one bot in details below.
Stale Bot#
Closing stale issues and pull requests, meaning they have no new comments, no new commits or changes to labels or milestones, is something that many popular open source projects do to minimize number of open issues. If an issue wasn’t fixed or a feature request wasn’t implemented in several months, maybe it’s not that important.
Stale↗ is a Probot based GitHub app, that closes GitHub issues and pull requests after a certain period of inactivity.
Setting up Stale Bot#
First, add the Stale↗ bot to your repository.
Then create a config file, .github/stale.yml:
# Number of days of inactivity before an issue becomes stale
daysUntilStale: 60
# Number of days of inactivity before a stale issue is closed
daysUntilClose: 7
# Issues with these labels will never be considered stale
exemptLabels:
  - pinned
  - security
# Label to use when marking an issue as stale
staleLabel: wontfix
# Comment to post when marking an issue as stale.
# Set to `false` to disable
markComment: >
  This issue has been automatically marked as stale because it has not had recent activity. It will be closed if no further activity occurs. Thank you for your contributions.


# Comment to post when closing a stale issue. Set to `false` to disable
closeComment: false
And that’s all — Stale bot will scan your issues and pull request, add a comment to the ones without recent activity, and then close them.

Conclusion#
Automation is the only way to keep sanity maintaining an open source project. No time in the world is enough to verify everything your user and contributors are doing in your project’s repository — issues, pull requests, comments — manually. Let robots to the boring work and keep the fun part of the open source for yourself!