Deleting Notes#
NotesOne easy way to handle deleting notes is to render a “x” button for each Note. When it’s clicked we will simply delete the note in question from our data structure. As before, we can start by adding stubs in place. This might be a good place to separate the concept of a Note from the current Notes component.
Often you work this way with React. You set up components only to realize they are composed of smaller components that can be extracted. This process of separation is cheap. Sometimes it can even improve the performance of your application as you can optimize the rendering of smaller parts.
Separating Note#
NoteTo keep the list formatting aspect separate from a Note we can model it using a div like this:
app/components/Note.jsx
import React from 'react';

export default ({task}) => <div>{task}</div>;
Remember that this declaration is equivalent to:
import React from 'react';

export default (props) => <div>{props.task}</div>;
As you can see, destructuring removes some noise from the code and keeps our implementation simple.
To make our application use the new component, we need to patch Notes as well:
app/components/Notes.jsx
import React from 'react';
import Note from './Note';

export default ({notes}) => (
  <ul>{notes.map(note =>
    <li key={note.id}>{note.task}</li>
    <li key={note.id}><Note task={note.task} /></li>
  )}</ul>
)
The application should look exactly the same after these changes. Now we have room to expand it further.
Adding a Stub for onDelete Callback
#
onDelete Callback
To capture the intent to delete a Note, we’ll need to extend it to include a button that triggers a onDelete callback. We can connect our logic with that after this step is complete. Consider the code below:
app/components/Note.jsx
import React from 'react';

export default ({task}) => <div>{task}</div>;
export default ({task, onDelete}) => (
  <div>
    <span>{task}</span>
    <button onClick={onDelete}>x</button>
  </div>
);
You should see small “x”s next to each Note:
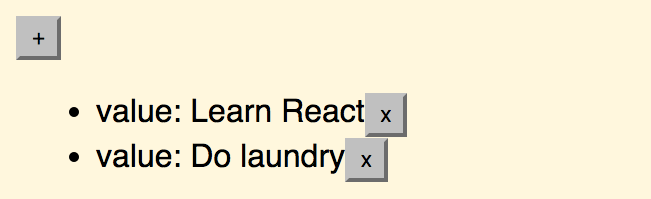
They won’t do anything yet. Fixing that is the next step.
Communicating Deletion to App#
AppNow that we have the controls we need, we can start thinking about how to connect them with the data at App. In order to delete a Note, we’ll need to know its id. After that we can implement the logic based on that at App. To illustrate the idea, we’ll want to end up with a situation like this:

e represents a DOM event you might be used to. We can do things like stop event propagation through it. This will come in handy as we want more control over the application behavior.
To achieve the scheme, we are going to need a new prop at Notes. We will also need to bind the id of each note to the onDelete callback to match the logic. Here’s the full implementation of Notes:
app/components/Notes.jsx
import React from 'react';
import Note from './Note';

export default ({notes}) => (
  <ul>{notes.map(note =>
    <li key={note.id}><Note task={note.task} /></li>
  )}</ul>
)
export default ({notes, onDelete=() => {}}) => (
  <ul>{notes.map(({id, task}) =>
    <li key={id}>
      <Note
        onDelete={onDelete.bind(null, id)}
        task={task} />
    </li>
  )}</ul>
)
To keep our code from crashing if onDelete is not provided, I defined a dummy callback for it. Another good way to handle this would have been to go through propTypes as discussed in the Typing with React chapter.
Now that we have the hooks in place, we can use them at App:
app/components/App.jsx
import React from 'react';
import uuid from 'uuid';
import Notes from './Notes';

export default class App extends React.Component {
  constructor(props) {
    ...
  }
  render() {
    const {notes} = this.state;

    return (
      <div>
        <button onClick={this.addNote}>+</button>
        <Notes notes={notes} />
        <Notes notes={notes} onDelete={this.deleteNote} />
      </div>
    );
  }
  addNote = () => {
    ...
  }
  deleteNote = (id, e) => {
    // Avoid bubbling to edit
    e.stopPropagation();

    this.setState({
      notes: this.state.notes.filter(note => note.id !== id)
    });
  }
}
After refreshing the browser, you should be able to delete notes. To prepare for the future I added an extra line in form of e.stopPropagation(). The idea of this is to tell the DOM to stop bubbling events. In short, we’ll avoid triggering possible other events elsewhere in the structure if we delete a note.
Conclusion
#
Working with React is often like this. You will identify components and flows based on your needs. Here we needed to model a Note and then design a data flow so that we have enough control at the right place.
We are missing one more feature to call the first part of Kanban done. Editing is hardest of them all. One way to implement it is to solve it through an inline editor. By implementing a proper component now, we’ll save time later when we have to edit something else. Before continuing with the implementation, though, we’ll take a better look at React components to understand what kind of functionality they provide.